Showing posts with label Crafts. Show all posts

Monday, October 20, 2014

Kitchen Transformation


Well you can definitely say that we have been in "nesting" mode at our house. We are doing all kinds of touch ups to the house in order to get ready for the baby! It's been really fun preparing everything for his arrival. We really wanted to do something different with the cabinets because they were looking a little worn. Luckily we have the coolest landlords who let us paint the whole kitchen! We are extremely lucky to live where we do.

It was hard deciding what to do for the color, but we went with an off white. I am so happy with the way it turned out! It has really brighten up our whole kitchen.We wanted to add a splash of color so we painted the island a polaris blue. I think it gives the kitchen just what it needs!  It's unbelievable the difference a little paint can make. It was a long process, but it was totally worth it!

It's so funny, ever since the kitchen has been finished I won't let it get dirty at all. Right when Ben gets something out I put it away. Or if we have one dish in the sink, I wash it. It's a little ridiculous how clean I want the kitchen to be... but that could be because it took us a long time for it to be finished.


{BEFORE}


{AFTER}


Wednesday, August 20, 2014

How to Stain a Kitchen Table


I am in total "Nesting" mode right now. I have been trying to get everything prepared for the arrival of our little boy! My first project was the kitchen table. I wanted to change things up a little. Plus, the original finish was chipping off and it kinda hurt your bum when you would sit down....Sooo Ben and I said it was time to give this kitchen table a makeover. 


{Chairs Before}


{After Sanding}


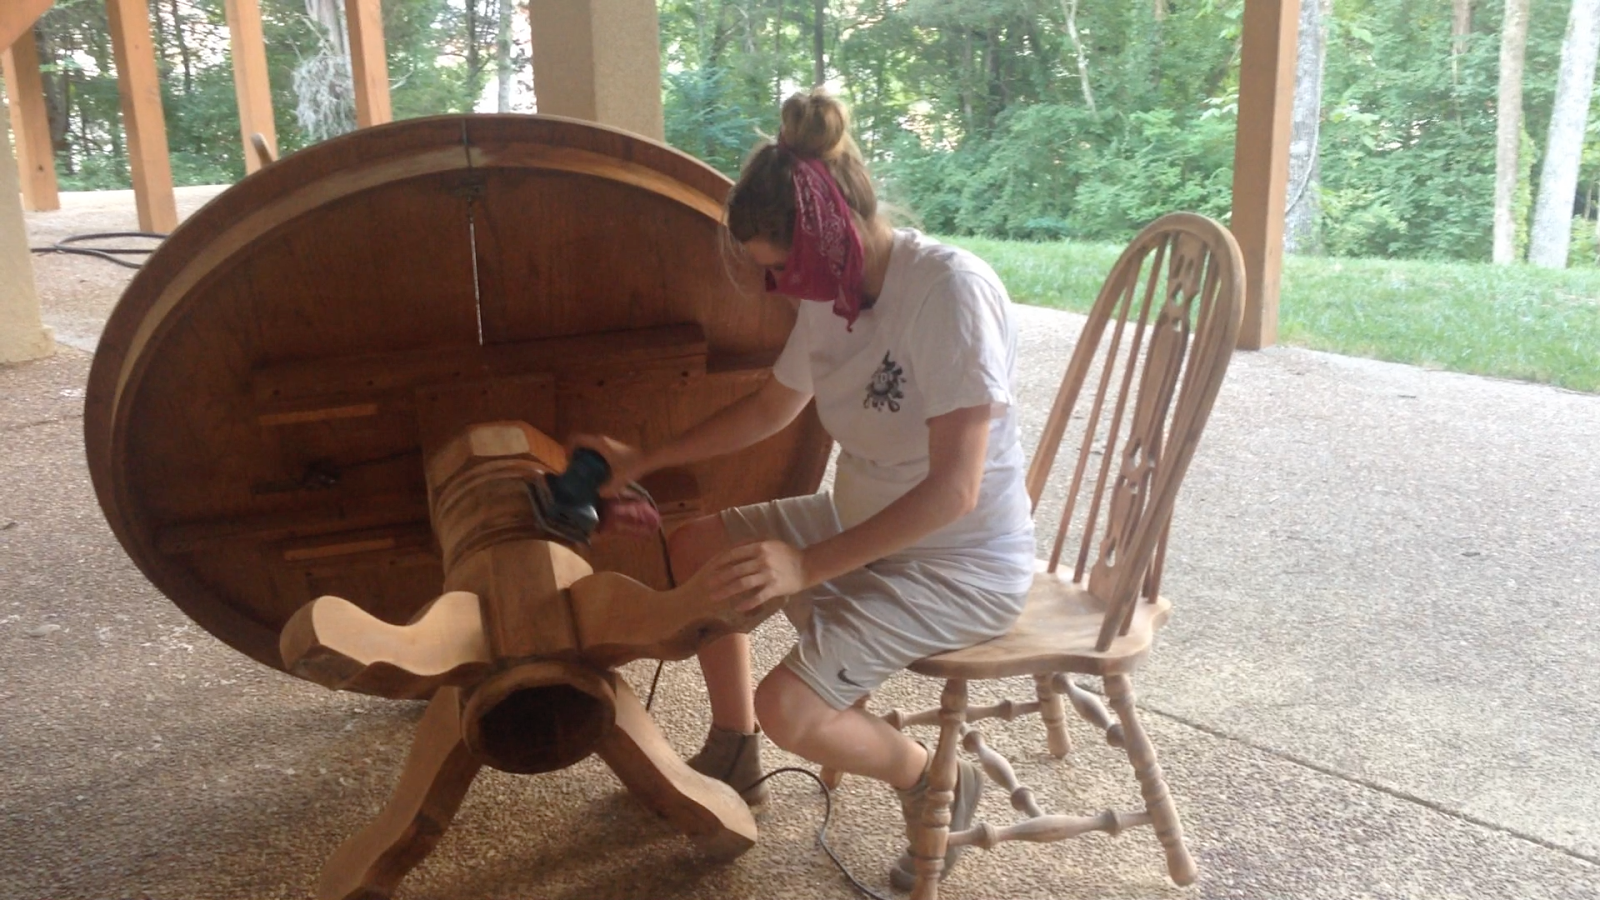
I used an 80 grit sand paper over every section of the chair.  After I had finished that, I moved to a 150 grit sand paper to finish off any rough edges (I would suggest going to a 180 or higher for a very smooth finish). I did this same thing for all the chair and table. I used an electric sander for most of the chair and a hand sander for the harder to reach areas. 

My makeshift mask which helped the excess from the chairs not even up in my nose and mouth. It worked perfectly... although it did make it extremely hot. 


{Table Before}


I sanded the top and bottom of the table multiple times to make sure all the old finish was off. I wish I would have sanded the top of the table a bit more. There was still some left over finish from the original table, which made staining more difficult. So make sure you get ALL the old finish off in order to have an easier time staining. 

{First coat of stain} 


After I had finished the sanding I used Minwax Pre-Stain Wood Conditioner. Remember to apply the pre-stain along the grain of the wood. After the pre-stain dried I used Minwax Dark Walnut Wood Finish. I applied several coats because I wanted a dark finish. The more coats you put on the darker the stain will be. After each coat wipe off the excess stain using a rag. I would highly recommend using gloves during this process. If the stain gets on your hands it will be there for a couple days. 


After several coats of stain


After the wood was to the darkness I wanted, I applied Minwax Polyurethane to seal and protect the wood. You will want to use a brush that is specifically made to handle polyurethane. After you have applied the polyurethane make sure the table is completely dry before you start using the table. 


Wal-ah you're finished! Pat yourself on the back. I know I did after I was finished. This was a long process... but totally worth it in the end! I am so happy with the way the table turned out. 


                                                           {BEFORE}                                                             


 {AFTER}


I painted the table legs an off white  and the chairs a Polaris Blue. I am really happy with the way the table as a whole turned out. It was totally something that the kitchen needed to feel finished.


{Finished Product}


Thursday, December 5, 2013

Christmas Craft


So, I thought I would be crafty and make tiny Christmas Trees!! I was so excited about this I couldn't wait to share it on here!!

NEED: 

Scissors
Glue Gun
Glue Sticks
Card stock paper 
Twine 
Tape

*All of this you can purchase at any craft store


Directions:
Cut the corners of the card stock paper so it looks like a baseball stadium. Then, roll paper into a cone shape and tape. If it's not perfectly straight you can cut it at the bottom to make it balanced. I found it easiest to glue like an inch or two and then wrap the twine. Repeat this process till you reach the end then cut the twine and you are finished! 


Merry Christmas!


Monday, December 2, 2013

Perfect Christmas Sign

Perfect thing for the house during Christmas!! 
Really easy!  Just buy some Crayola chalk and you are ready to go! I really want to try it with paint so it can be more perminent. 


Saturday, March 2, 2013

Patriotic Craft

Easy to do Patriotic Craft!

First you get a shadow box at hobby lobby. I got it when it was on sale... which is half the price.


Next, I collected antique pieces that were centered around the theme. You could also try doing other themes with this same concept. This was the hardest part for me, because it was difficult to find exactly what I wanted. They only things that are not antique are the pins, everything else is.


These spoons were my favorite things I found. The are spoons with each presidents name and face. They also have a picture of what that president did during their term.


Finally put everything together... first lay it out the way you want and then glue. I just used a hot glue gun to hold everything in place.


Now we have the finished product on the wall in our "Patriotic room"

Monday, February 25, 2013

Decorating Mugs!


PERSONALIZED MUGS! 


I saw a lot of friends making these so I decided to give it a try.. It turned out so cute! All you need is a Sharpie Marker and two blank mugs! I got my mugs at the dollar store, but you could get some cool ones at goodwill. It was So easy and cute. Decorate how you like... and put it in the oven for 30 min on 350!! I can't wait to make more with other patterns and colors!! <3


Friday, February 1, 2013

Knitting!!!

 Yes! I finally learned how to knit! I was so excited... because now I can make tons of scarfs and maybe eventually a blanket! I think what I want to try first is an infinity scarf...
 They are so comfy and cute.. not sure how it will turn out, but we will see.


This is just the beginning! Little by little I'll make my scarf.
 I love sitting here knitting while Ben watches Football! He was pretty happy I learned, because now I will be more occupied during the game...Girls understand that football gets boring after so long...so we need to do something to be able to watch 4 hours! If anyone wants to learn I am posting how to knit later on in my blog!

Pin It button on image hover
01 09 10