Wednesday, August 20, 2014

How to Stain a Kitchen Table


I am in total "Nesting" mode right now. I have been trying to get everything prepared for the arrival of our little boy! My first project was the kitchen table. I wanted to change things up a little. Plus, the original finish was chipping off and it kinda hurt your bum when you would sit down....Sooo Ben and I said it was time to give this kitchen table a makeover. 


{Chairs Before}


{After Sanding}


I used an 80 grit sand paper over every section of the chair.  After I had finished that, I moved to a 150 grit sand paper to finish off any rough edges (I would suggest going to a 180 or higher for a very smooth finish). I did this same thing for all the chair and table. I used an electric sander for most of the chair and a hand sander for the harder to reach areas. 

My makeshift mask which helped the excess from the chairs not even up in my nose and mouth. It worked perfectly... although it did make it extremely hot. 


{Table Before}


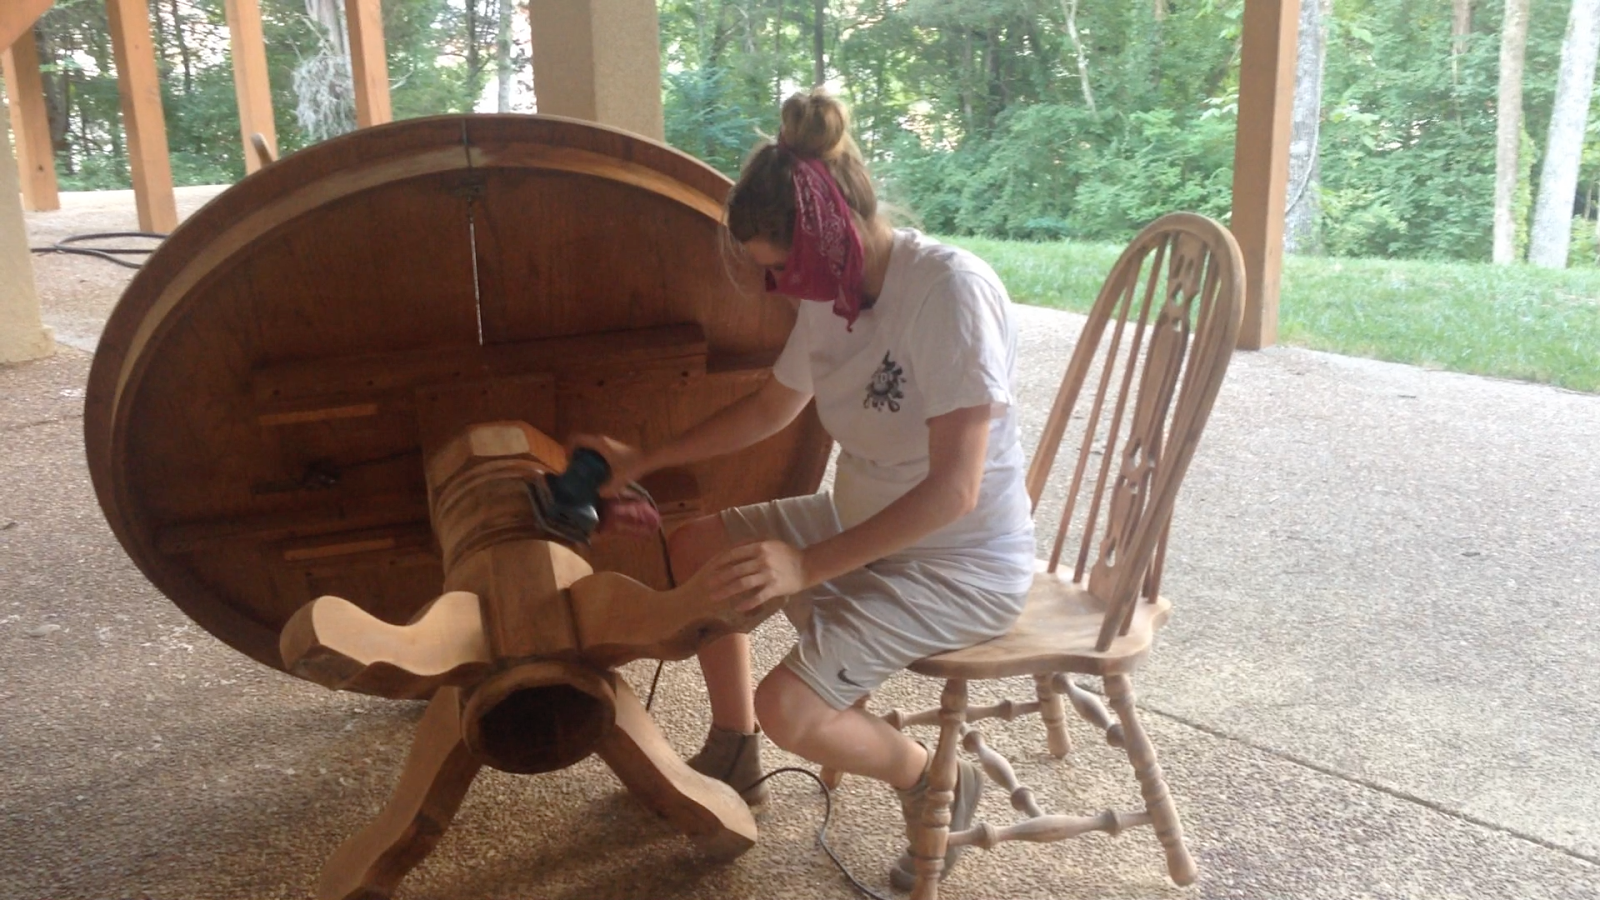
I sanded the top and bottom of the table multiple times to make sure all the old finish was off. I wish I would have sanded the top of the table a bit more. There was still some left over finish from the original table, which made staining more difficult. So make sure you get ALL the old finish off in order to have an easier time staining. 

{First coat of stain} 


After I had finished the sanding I used Minwax Pre-Stain Wood Conditioner. Remember to apply the pre-stain along the grain of the wood. After the pre-stain dried I used Minwax Dark Walnut Wood Finish. I applied several coats because I wanted a dark finish. The more coats you put on the darker the stain will be. After each coat wipe off the excess stain using a rag. I would highly recommend using gloves during this process. If the stain gets on your hands it will be there for a couple days. 


After several coats of stain


After the wood was to the darkness I wanted, I applied Minwax Polyurethane to seal and protect the wood. You will want to use a brush that is specifically made to handle polyurethane. After you have applied the polyurethane make sure the table is completely dry before you start using the table. 


Wal-ah you're finished! Pat yourself on the back. I know I did after I was finished. This was a long process... but totally worth it in the end! I am so happy with the way the table turned out. 


                                                           {BEFORE}                                                             


 {AFTER}


I painted the table legs an off white  and the chairs a Polaris Blue. I am really happy with the way the table as a whole turned out. It was totally something that the kitchen needed to feel finished.


{Finished Product}


Thursday, August 14, 2014

Freshly Canned Jalapeños

This was my first attempt at canning. Surprisingly, it was very easy. I was always scared canning was going to be this huge process and that I would mess it all up. This was the perfect thing to can for my first time. Now, we will have fresh Jalapeño all year long! These are homegrown Jalapeños which makes them even more delicious. 


Okay, I am going to share a little secret. I didn't seal these jars!!  I know that's not the normal routine when canning... but even without sealing the jars they will last a year! Skipping this step cut down on the time it took for the whole process. If you wanted the jalapeños to last longer than a year you would want to seal the cans. I didn't care to do that because I wanted this to be easy and quick. 
All You Need:


Jalapeño (as many as you want to can) 
Glass jars with lids 
White Vinegar 

So, what I did first was pour about 1 1/2 cups of white vinegar into a pot. You want to boil the vinegar so that it is extremely hot. While the vinegar is heating up, cut off or tear off the tops of the jalapeños. After that is done, stuff the jalapeños into the jars. Make sure there is no wiggle room. Next, use a funnel to pour the vinegar into each jar. Make sure every jalapeño is covered with the vinegar. Once this process is done put on the lids very tight. Then, let the jars sit out till they have cooled down. Once they have cooled enough place them in the fridge. Presto! That't it! You are finished! Now, each time you need a jalapeños just go in the fridge and take out your jar. Fresh Jalapeños every time! 


Pin It button on image hover
01 09 10